Showing posts with label About Albert. Show all posts

Batteries replaced and recycled

It's the time of the year when temperatures begin to drop and batteries struggle. As I reported on our recent Autumn Cruise, our stater battery failed as we started our journey. Well during our trip it was clear that our domestic batteries (I don't know why they refer to them as leisure) also struggled and it was clear that the little tell-tales that show their charging condition (acid specific gravity) was not showing green. So it was a big sort out. The failed domestic batteries had lasted over five years and the starter a bit longer - probably six.

I purchased two domestic batteries from Baxters at Yardley Gobio Wharf, swapped the temporary start battery they had supplied earlier into a domestic so I had three identical domestic batteries. I then purchased a new 664 starter battery from Midland Chandlers. Like many boaters I contemplated upgrading the domestic battery technology but given the cost, options available and the charging system on Albert, I went for a like-for-like replacement.

No green indicator despite the battery charger
(top centre of image)

Our truck-sized starter battery.

This left me with four dead 110 AH lead acid batteries. In the past I have taken the old batteries to the local tip, but this time I browsed the internet, talked to fellow moorers at the marina and decided a trip to a local scrap metal merchant in Bletchley was on the cards. The world of scrap metal is now very professional. I delivered the batteries to the yard; they weighed them and then directly transferred to my bank account around £40. It's well worth considering the local scrap dealer when disposing of  old lead acid batteries, it goes someway towards defraying the cost of the new batteries.

Diesel Drip Pot

The Ruston & Hornsby 2YWM in Albert has a Mico (Bosch India) direct injection system that utilises a pair of jerk pumps driven from the crankshaft. The two pumps are controlled by a rack attached to the governor. As part of the system minute amounts of fuel can seep past the rack mechanism. This leakage is normal and is emitted from a port at the base of the injector. When Phil Lizuis was working on the engine a short time ago he pointed out that some similar engines have a drip pot fitted to collect this fuel. The drips are few and far between but they are occasionally noticed. After I recently carried out an oil change I decided that although the amount was very small, allowing this fuel to collect in the drip tray below the engine was not really acceptable so I set about designing a collection system to fit onto our engine.

Fuel drip line from direct injection pump

The two ports on the injector pumps are 5/16 UNF - or so I found out after some investigation. It isn't easy establishing internal thread sizes on a engine with mixed Imperial and Metric thread sizes and the R & H parts manual I have wasn't very specific. I decided to connect the injectors to a drip pot using standard 1/8 inch flexible fuel pipe that is commonly used on a variety of diesel engines. This should have been quite simple via standard brass adapters but the fuel filters on our 2YWM were too close to one of the pumps and so I had to resort to making up a pair of special short adapters. The drip pot I sourced by adapting a glass-bowled fuel pre-filter. I removed its internals, adapted its porting to take two fuel inlet pipes and then drilled an air-vent into the top. The drip pot is bolted low down on the side of the engine casing. I will have to wait and see just how much fuel makes it into the pot.

New fuel drip pot showing air vent

The original photos (below) from Waterways World, promoting the 2YWM MkV engine show a drip pot to the right and below the two fuel filters.

Ruston & Hornsby 2YWM MkV as delivered to customers by Keith Jones

Bed Storage Project

Storage on narrowboats, irrespective of their length, is always valuable. Our double bed, which is 4 ft wide and therefore technically a "small double", sat on a fixed base. Originally the storage under the bed consisted of a box stretching across half the bed and accessible via two drop down flaps, and two modest drawers strategically positioned  at the end of the bed (where there is a small alcove adjacent to the Alde heating and one of our two wardrobes).

The bed base on Albert was originally constructed from wooden slats. Soon after purchasing Albert I discovered that half the area under the bed base was unused and the space wasted. Getting access to this area was simple - I just cut the slats in half and lifted them out position whenever I needed access. Thus was born Albert's deep storage.

However, the physical effort to gain access was considerable because it required lifting and removing the heavy mattress. Over the years this deep storage has become invaluable, particularly for bedding and duvets, but the effort involved became a chore. Recently, with the change from summer to autumn boating, and the need to accommodate some extra bedding for our grandchildren, we accessed the deep storage on several occasions and it became irksome, so I began to contemplate improving access to the whole of the under bed area.

My concept was for a lifting solid base using gas struts that would allow for easy access to both sides of the bed. I chose 18 mm thick plywood sheeting for the base and used the cutting service at B & Q to get it accurately cut to the bed aperture. The next stage was to provide suitable ventilation via a series 48 x 70 mm holes cut by hole-saw. It took most of an afternoon to carry this out tedious task but I was pleased with the result.

Ventilated Bed Base

To provide lift (and support) I chose two locking gas struts hinges from SGS. The weight to be lifted is required for specifying the struts. In this case the mattress weight was not easy to obtain. We purchased our mattress in 2016 from John Lewis but strangely the don't regularly provide mattress weights. It took some phone calls and a couple of days before I eventually got hold of a furniture specialist who provided the data. Our mattress weighs in at 24 kg and the base 18 kg.

Fitting the hinges required some physical effort because of the size and weight of the board and aligning the hinges was not simple but I achieved it using the instructions from SGS. Once in place the hinges worked well, so now we can get to deep storage without great effort.


Storage 
("normal" left & what was "deep" to the right)

SGS Locking Gas Strut Hinge

Cosgrove for an Oil Change

I like to get the sump on the Ruston nice and warm when changing the oil and often carry out changes of an evening when cruising. On our last trip up the Ashby there were a few things to sort out following the boat painting and bathroom refurb so I never got around to changing the oil. With yesterday being a sunny warm day we decided to take a trip to Cosgrove to change the oil and do few other jobs.

A quiet Sunday in Cosgrove

It was quiet on the canal with only the occasional boat passing, mostly hire craft from Wyvern Shipping or Alvechurch.

Cans and Rag Mop on the Roof

After changing the oil using the brass hand pump attached to the engine, I cleaned out the sump below and replaced the oil-absorbent pads. It was a very messy job made worse by a recent diesel leak. The pipework from the twin fuel filters to the injector pumps has numerous copper washer seals and one joint had an intermittent leak. I manage to realign the filter and replace the washers and that appears to have solved the problem. The sump now looks respectable which is more than can be said for my overalls.

Paraphernalia Refurbished

I like to try and keep Albert looking as "traditional" as possible so we usually cruise with the chimney, chimney chain, cabin strings, water cans and mop on the roof. I usually refer to this as our paraphernalia.

Although this stuff doesn't stay out in all weathers, it does deteriorate so when Albert went in for a repaint I decided to call it a day for our mop, which wasn't very special, and refurbish the original water can (Buckby) that came with Albert. After around 20 years of use, the finish on the can was dull and at one time I had decided that I would line it out in cream, rather than yellow, and this did not match with the can we bought at Crick Boat Show just a few years ago. So I decided to line out the original can in yellow, touch up areas of faded base colour and varnish it. I must say I am pleased with the result - both cans now look bright and more similar.

Albert's refurbished original can (left) with can painted by Sue Woodward (right)

To replace the old mop I decided to go traditional and make a 6 ft 6 inch long rag mop using a 1 1/4 inch diameter ash pole. I basically followed the excellent instructions posted by Blossom. The felt came courtesy of a donkey jacket I obtained from a laboratory that closed down over a decade ago.

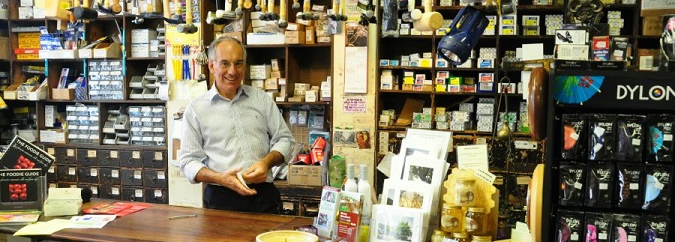
Attaching the felt strips to the end of the pole has been a point of discussion in canal forums but using a rose headed spike (or nail) appeared to me be the most traditional way and not particularly difficult, so I went along that route. We are lucky to live near one of the country's best traditional ironmongers - Odells. They didn't immediately have one in stock but David Odell found one hiding at home and he kindly helped me out. Once I had accurately drilled the pilot hole into to the end of the ash pole, fitting the strips to the end of the pole using the pattern specified by Blossom was, as I hoped, a doddle.  

view of shop
 David Odell in his emporium

Painting the rag mop can be interesting (that's code for difficult), particularly if you go for spirals. I decided that discretion was the better part of valor and go for regular stripes. Red, yellow and green appeared appropriate and matched the cans, so after some interesting masking up and several coats applied over several days, I got a brightly coloured traditional rag mop.

Rag mop and water cans (Buckby)

Whilst taking the pictures for this post my youngest granddaughter Matilda took great interest in the brightly coloured cans. I couldn't resist adding a picture of her examining them.

Matilda (aged 13 months) with water cans and rag mop

Many thanks to the directions of Blossom.

Repaint Finished

Today Albert left the dock at High House Wharf. Colin and I spent the afternoon fitting the the fenders, reinstating paraphernalia such as the planks and the cratch cover, and then juggling boats around on the wharf. Tomorrow Colin is signwriting a boat.

Albert does look a treat and we are really delighted with the job Colin Dundas has done.


Out of the Dock

Pigeon Box

Bow Decoration

Reconditioned Stern Doors
(Dollies are now red)

Detail of New Scumbling & Harlequin stripe


Colin's identification "tag"

Repaint: Now for the Decoration

This morning I visited Colin Dundas to find that the coachlines and scumbling were in progress. Still some way to go but the sign-writing should be soon.

Coachlines

Well-deck and cratch-board preparation

Scumbling

Harlequin decoration on the roof

Repaint Progress

After all the preparation time, Colin Dundas is now into serious paint application. Albert is beginning to look smart. 


Shiny cabin side

Preparation for scumbling the lockers


Brass Cleaning

Albert is traditional and has brass (not chrome) external fittings. We try to keep the mushroom vents shiny but most other brass items rarely get a good clean - it's simply too much work. However, with all the external brass-work off the boat for painting it's a good opportunity to get it cleaned and shiny.

I recently invested in a small bench grinder and polisher and spent some hours buffing. Some items like the stirrups, which hadn't been cleaned since they were fitted, now look shiny. I'm quite pleased with the results.

Not a bad job for a snowy day. Mind you this is St David's day, first day of Spring, and it's been -5 °C outside all day. We have so far escaped the worst of the snow, unlike Central Scotland and the South West.

Brass polishing


Paint going on

With the "Beast from the East" hitting this area (tonight it's already - 5° C) I'm glad Albert is in a heated dock. I visited High House Wharf on Monday and it was cold, sunny and clear. Paint is at last being applied to Albert - the roof has had some coats applied.

Colin's gaudy van

Grey satin finish roof

"Red-oxide" roof at the stern


Later in the week Colin applied the first of the gloss coats to the cabin side and sent me a video. It shows the stern section where the base coat is black. This part of the cabin sides will be scumbled and sign-writing added. It looks shiny! Most of what you can see is the reflection of the sides of the dock building and the companion ways.

Painting Progress

Visited Albert on Monday to check on progress. I picked up the brass fittings so I can start polishing. I also picked the liners for the stern doors. Maggie did the decoration and its lasted well over the last 10 years. However the varnish needs renewing so I have a little project.


Sample panels for the earlier scumbling

Under the wooden liners that I removed there was an interesting artifact that doesn't often see the light of day. When an earlier boat painter (prior to 2003) was trying out scumble systems he used the area as a "sample piece". My guess the left door is the Dulux Brushwood that he used. This time with Brushwood being discontinued an new solution will be needed. I gather Colin has got it sorted out


Fatigue

No I'm not tired. This post is about metal fatigue.

As the book says:

Fatigue may occur when a member is subjected to repeated cyclic loadings. The fatigue phenomenon shows itself in the form of cracks developing at particular locations in the structure. 

Cracks can appear in diverse types of structures such as: planes, boats, bridges, frames ,cranes, overhead cranes, machines parts, turbines, reactors vessels, canal lock doors, offshore platforms, transmission towers, pylons, masts and chimneys. 

When Colin Dundas was preparing Albert for painting he noticed a narrow fatigue crack adjacent to the engine room hatch on the port side and called me in to inspect it. Fatigue can influenced by geometry. The hatch surround was likely to be the weakest spot for vibrations from the engine.

Albert has a classic two-cylinder engine and I suspect that fatigue was at its worse just before our engine mounts failed in summer 2016. When I looked at the engine mount damage I suspected that one of the mounts had had a long term crack and that vibration levels had been slowly increasing long before both mounts on the starboard side let go. 

The cracks by the hatch were not in part of important structure, but I was thankful for Colin recognizing what they were and then hiring in a welder to sort it out. The welder drilled the ends of the cracks to stop further propagation before neatly welding it all up.

Cracks prepared for welding

Finished

Repaint Progress

So Albert is is in the dock and all the fittings, windows and hatches have been removed. Rust spots are being treated and some rubbing down has started.

We visited High House Wharf and discussed with Colin colour shades and details such as how the windows will be refitted. Start of a long process.

Windows Out

Albert having a Repaint

Last August I noted in a post that we were considering having Albert repainted. Our last repaint was successful and it lasted well, but on the basis that much of the paintwork has faded and a few spots of rust had appeared, we felt it was time to have a repaint before serious deterioration set in. A few of our friends have commented that we hadn't had it done that long ago - I had to remind them that the last paint job was 10 years ago!

Albert looking shiny - but this is the good side and its just after the rain!

Having arranged with Colin Dundas for a slot at his facilities in March, I rang up Colin recently and discovered that he could move us forward into February because of a change in plans for another client. This was OK by us because the dock is heated and humidity is monitored. So last weekend we moved Albert north to High House Wharf.

I got the boat prepared in the rain on Saturday. I could not resist taking a photo of the sign-writing because, somewhat ironically, it looked really good in the rain. On Sunday we made our way north going up the Stoke Bruerne flight alone and with only a pair of boats coming south. The dry bright but cold weather had brought out the walkers and both the canal-side pubs at Stoke looked busy. It's great boating on days like that.

Grafton

In the top pound Stoke Bruerne Flight

Stoke Bruerne Top Lock
CRT installing mooring rings at Stoke Bruerne

We made High House around 4:30 PM. At this time of the year that's just before dusk. We winded and then moored up just outside the dock. The process wasn't made easy by a plonker mooring a boat right opposite the winding hole! There was plenty room all along the section between the bridge and the marina - a typical case of "not engaging brain". We winded with only a few inches to spare. 

On the Monday I moved Albert into the dock and discussed paint matters. A few sheets of thin ice had formed overnight on the surface of the canal. We are basically going for the same scheme but with a few minor changes/improvements. I think the first job will be removing the windows.

Bathroom Refurbishment Part Two


When you start a refurbishment its hard to know when to stop. As I reported earlier, we had our bathroom tiled and a new shower and washbasin fitted. This looked so good we decided to go further. Maggie is currently making some new curtains for the smallest room and I was persuaded to remove the wallpaper that covered the panels in the toilet area. 

When we bought Albert back in 2003 half the panels in the bathroom were covered in a tasteful Laura Ashley wallpaper called Palmetta . We know it was Palmetta because we had the same design in our dining room at home back in the late 1980s. The design matched the floating cottage antique look Albert has but we decide early on on a brighter look and went for a plain Laura Ashley paper that contained a delicate motif that matched some Laura Ashley cranberry-coloured curtains. 

So after some discussion we decided this time that, although wallpaper can clearly work on some areas of boats,  it can be tricky particularly with wet winters and bathrooms with showers. Paint it was to be.

Wallpaper off - now to get off the glue!

No problem really - just strip off the paper and then apply the paint. Well there were two layers of paper and the original was stuck on with lots of glue. So the steamer came out. In a cramped area such as a boat bathroom it was quite exciting. I got into some interesting positions. 
.
Primer on - now for the top coats


It took two steams - one for the two layers of paper and another for the glue. That was followed by a lot of sanding and then priming and finally three coats of paint! Not a big job really, but every stage required around half a day at the boat. In total I had eight visits.

Finished!

Today we finally finished and I must say I am pleased with the look. We now have a very smart "smallest room on the boat" and it should be more practical. 

But wait! Maggie still has the curtains to finish. They will be the same pattern as the old, and of course Laura Ashley. but they should look fresh and clean.

Original Palmetto paper


Magnetic Kingfisher

Our friends in Sheffield bought us a very special present a year ago - a kingfisher made from cutlery (mostly spoons) by a talented local artist. With the subject matter it just had to decorate Albert. With its magnetic base adapted from a lawnmower clutch it was ideal for a prominent position on top of the stove.

Cutlery Kingfisher

It now appears that the artist who made our Kingfisher, Jason Heppenstall, has had a significant commission. Carrying on the ornithological theme, has now made a bigger and better bird, a peregrine falcon that now sits outside the station in Sheffield. The falcon is made entirely of IKEA Allen keys.

Falcon and artist Jason Heppenstall

The message must be - when you have constructed your flat-pack furniture don't throw away the tools they could be handy one day!